If you have a physical business, getting your location onto Instagram isn't just a nice-to-have—it's essential. This means doing three things consistently: adding a clickable address to your profile, tagging your location in every feed post, and using the location sticker in your Stories.
These aren't just vanity features. They are powerful tools that make your business show up for local customers and can seriously boost your engagement.
Why Adding Your Location to Instagram Is a Game-Changer
Before we get into the "how," let's talk about the "why." Adding your location is more than just dropping a pin on a map. It’s a strategic move that bridges the gap between your digital world and your physical storefront, turning casual scrolling into actual foot traffic.
When someone sees your business is "near me," it sparks an immediate connection. That simple tag transforms your content from a generic ad into a tangible, local invitation.
Driving Discovery and Engagement
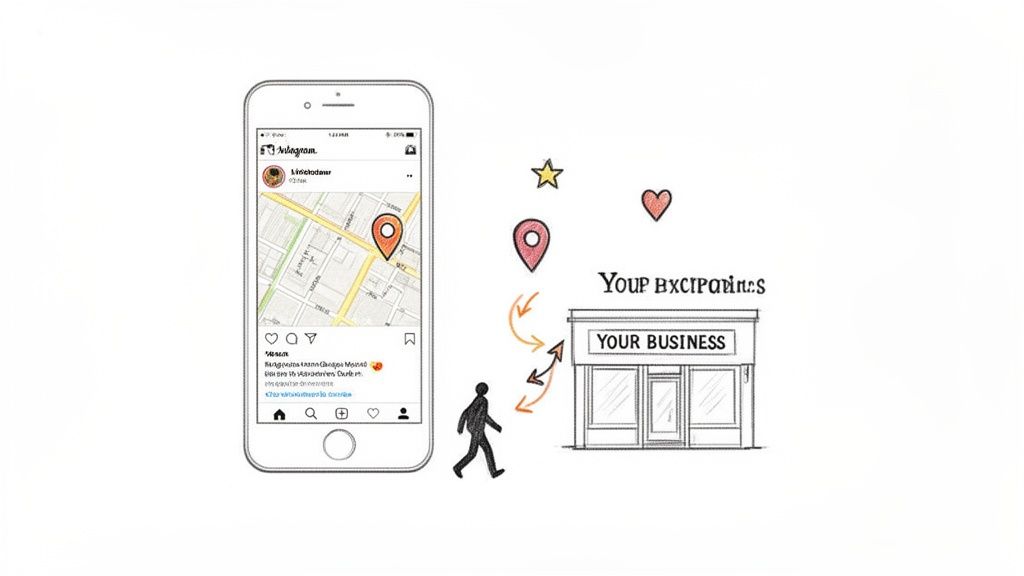
Picture a local coffee shop. They post a stunning photo of a new latte and tag their shop's location. They're not just showing off their latte art; they're making that post discoverable to anyone searching that specific neighborhood or city on Instagram.
A user exploring that location page might see the post, tap over to the profile, and decide to walk over for a coffee right then and there.
This kind of hyperlocal visibility is a huge win. The data doesn't lie—posts with a location tag see a whopping 79% more engagement than posts without one. That jump in likes, comments, and shares pushes your content out to a much wider, and more relevant, audience.
When you tag your location, you’re essentially adding your business to a living, user-generated billboard for your neighborhood. Every customer who tags your spot in their own posts or Stories adds to it, building powerful social proof and organic reach for you.
To give you a clearer picture, here’s a quick breakdown of how these features directly benefit your business.
Key Benefits of Using Instagram Location Features
| Feature | Primary Benefit | Best For |
|---|---|---|
| Profile Address | Makes your business instantly findable and provides a one-tap way for customers to get directions. | All brick-and-mortar businesses, service-area businesses, and event venues. |
| Post Location Tag | Increases post engagement and makes your content discoverable to people searching for that location. | Highlighting your storefront, promoting local events, or featuring user-generated content from your venue. |
| Story Location Sticker | Drives immediate, time-sensitive engagement and adds context to real-time updates and promotions. | Daily specials, flash sales, behind-the-scenes content, and event coverage. |
As you can see, each feature plays a specific role in connecting your online activity to real-world results.
Integrating into a Broader Local Strategy
Adding your location is a foundational piece of a much larger puzzle. It signals to both users and the Instagram algorithm that you're an active part of a specific community, which is a core component of any successful local marketing strategy for your business.
For businesses with multiple storefronts, this is even more critical. Consistent and accurate location tagging for each branch helps customers find their nearest spot, prevents confusion, and lets you run location-specific promotions.
Ultimately, knowing how to add your business location to Instagram gives you the power to:
- Increase Foot Traffic: Make it incredibly easy for users to get directions straight from your profile or posts.
- Boost Local SEO: Location signals contribute to your overall online visibility in local searches on and off Instagram.
- Enhance Community Building: Become a recognized, tagged, and shared part of your neighborhood's digital conversation.
Adding a Clickable Address to Your Instagram Profile
For any brick-and-mortar business, your Instagram bio is prime real estate. Adding a clickable physical address is the single best way to turn that space into a direct path to your front door, converting online lurkers into real-life foot traffic.
This simple feature gives customers a one-tap way to get directions, cutting out the friction that costs you visits. It also signals to both users and the Instagram algorithm that you have a physical presence worth checking out.
Just a heads-up: you'll need an Instagram Business or Creator account to do this. The option isn't available on personal profiles. If you haven't switched over yet, that's your first move. It’s a quick change in your settings and unlocks a ton of useful tools.
Getting to Your Contact Options
Once you're on a professional account, the process is pretty straightforward. You'll be making this change right from your profile settings.
First, head to your main profile page—the one with your photo grid and bio. Tap the "Edit Profile" button, which sits right below your follower count.
This takes you into a new menu where you can tweak all your profile details. You're looking for the specific section that manages how people can contact you.
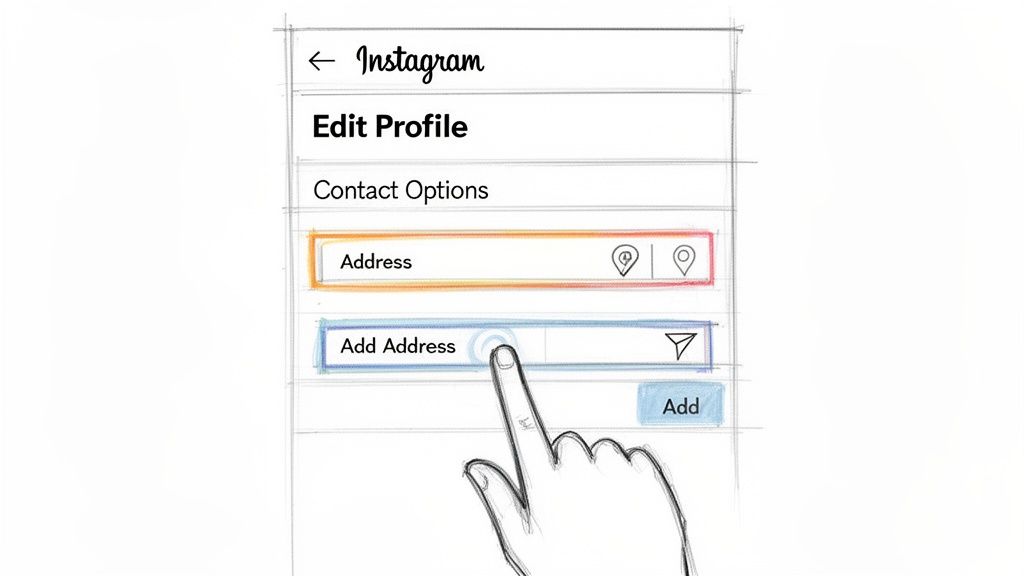
On the "Edit Profile" screen, scroll down until you find "Contact Options." This is the control center for all your public business info, like your email, phone number, and, of course, your physical address.
Adding and Formatting Your Address
Inside "Contact Options," tap on the "Business Address" field. This is where you’ll enter your location details. Instagram will ask for the specifics:
- Street Address: Your exact street number and name.
- City/Town: The city where your shop is located.
- ZIP/Postal Code: Make sure this is complete and accurate.
Be super careful here. This info feeds directly into map services like Apple Maps and Google Maps. A tiny typo could send a potential customer on a wild goose chase, which is a terrible first impression. Double-check everything before you hit save.
Pro Tip: After you type in your full address, you’ll notice a "Display full address" toggle. If you run your business from a home office or just want to show a general service area, you can switch this off. Your profile will only show your city and state, giving you a bit more privacy while still confirming you're a local business.
Once you tap "Done" and save your changes, a blue, clickable address will appear on your profile. Now, anyone who taps it gets an instant prompt to open their map app with your location already plugged in. It’s a game-changer for driving foot traffic.
How to Tag Your Location in Instagram Posts and Stories
Alright, you've got that clickable address locked into your profile. Now it's time to start weaving your location into your everyday content.
Tagging your business in individual feed posts and Stories might seem like a small step, but its impact on organic discovery is huge. This is how you consistently pop up in front of a local audience that might not follow you yet.
Every time you tag your location, you’re dropping a breadcrumb that leads new customers right back to your business. Imagine a local restaurant posts a killer photo of a new dish and tags its location. Someone exploring that neighborhood on Instagram sees the post, gets hungry, and now knows exactly where to find it. That's the power of the geotag.
Geotagging Your Feed Posts for Maximum Reach
Adding a location to your feed posts is one of the last things you do before hitting "Share," but it's often the most overlooked. It's incredibly simple.
After you've picked your photo or video, slapped on a filter, and crafted the perfect caption, you'll see a field that says "Add Location." Tap it. A search bar and a list of nearby places will pop up.
Just start typing your business name and select it from the list. Once you do, that location appears in light gray text right below your username on the final post. And yes, it’s clickable. If you're a boutique in SoHo, you could tag "SoHo, Manhattan," but it's way more powerful to tag your specific, custom business location.
This tiny action does more than just add context—it makes your post discoverable to anyone searching for or browsing content from that specific area, pushing your reach far beyond your current followers.
Using the Location Sticker in Instagram Stories
Instagram Stories give you an even more dynamic way to show off where you are: the location sticker. For driving immediate, in-the-moment engagement, this little feature is a total game-changer.
Once you’ve snapped a photo or recorded a video for your Story, tap the sticker icon (the smiley face square) at the top of your screen. You'll spot the "Location" sticker right away; it's usually one of the first options.
When you use the location sticker, your Story gets added to the public Story reel for that location. This means anyone—even people who don't follow you—viewing that location's public Story can see your content. Hosting an in-store event or a flash sale? This is how you generate a surge of local foot traffic.
After you select your location, you can tap the sticker to cycle through different color schemes and styles, making sure it fits perfectly with your brand's vibe. You can find more creative ways to work this into your content in our guide to Instagram photoshoot ideas that will really make your posts pop.
Here are a few quick ideas:
- Retail Shops: Use the sticker during a weekend sale to pull in nearby shoppers who are already out and about.
- Restaurants: Tag your location when you post the daily special. You'll catch the eye of people nearby looking for lunch.
- Service Providers: When you're on-site at a client's place (get their permission first!), use the sticker to show off your service area in action.
Creating a Custom Instagram Location When Yours Doesn't Exist
So you've searched for your business to tag it in a post, and… nothing. It's a surprisingly common headache for new businesses or anyone in a recently developed building, but thankfully, there’s a fix.
Here's the secret: Instagram doesn't actually manage its own location database. It pulls all its geotagging information directly from Facebook. This means if you want to create a new location for Instagram, you first have to create it on Facebook.
Now, this is where most people get tripped up. You don't do this from your Facebook Business Page. Instead, the magic happens through the "Check In" feature on your personal Facebook profile, using the mobile app.
The Facebook Check-In Method
First thing's first: make sure your phone's location services are turned on for the Facebook app. For this to work best, you really need to be physically at your business address. Standing right there on the spot helps Facebook verify the location instantly and accurately.
Ready? Open the Facebook app and act like you're about to make a new post. Just below the text box, you'll see a few options—tap on "Check in."
A list of nearby places will pop up. Since your spot isn't on the list yet, type your full business name into the search bar. When it (inevitably) comes up empty, scroll all the way to the bottom and you'll see an option to "Add a new place." This is what you're looking for.
Defining Your New Location Details
The next screen is where you'll build your location from the ground up. Be precise here, because what you enter is exactly what will show up on Instagram.
- Place Name: Use your official business name. No extra keywords or fluff.
- Category: Pick the one that best describes what you do, like "Coffee Shop" or "Health/Medical."
- Address: Enter your complete, correct street address, city, and zip code. You can also drag the pin on the map to get your location spot-on.
Once you’ve double-checked that everything is perfect, save the new place. Facebook now has to process and approve it, but you've officially put your business on Meta's map.
Important Takeaway: It can take anywhere from a few hours to a few days for your new location to sync from Facebook over to Instagram. Don't panic if it doesn't show up immediately. Just give it some time.
Once your location is ready, you can start using it in all the ways that matter, as this flowchart shows.
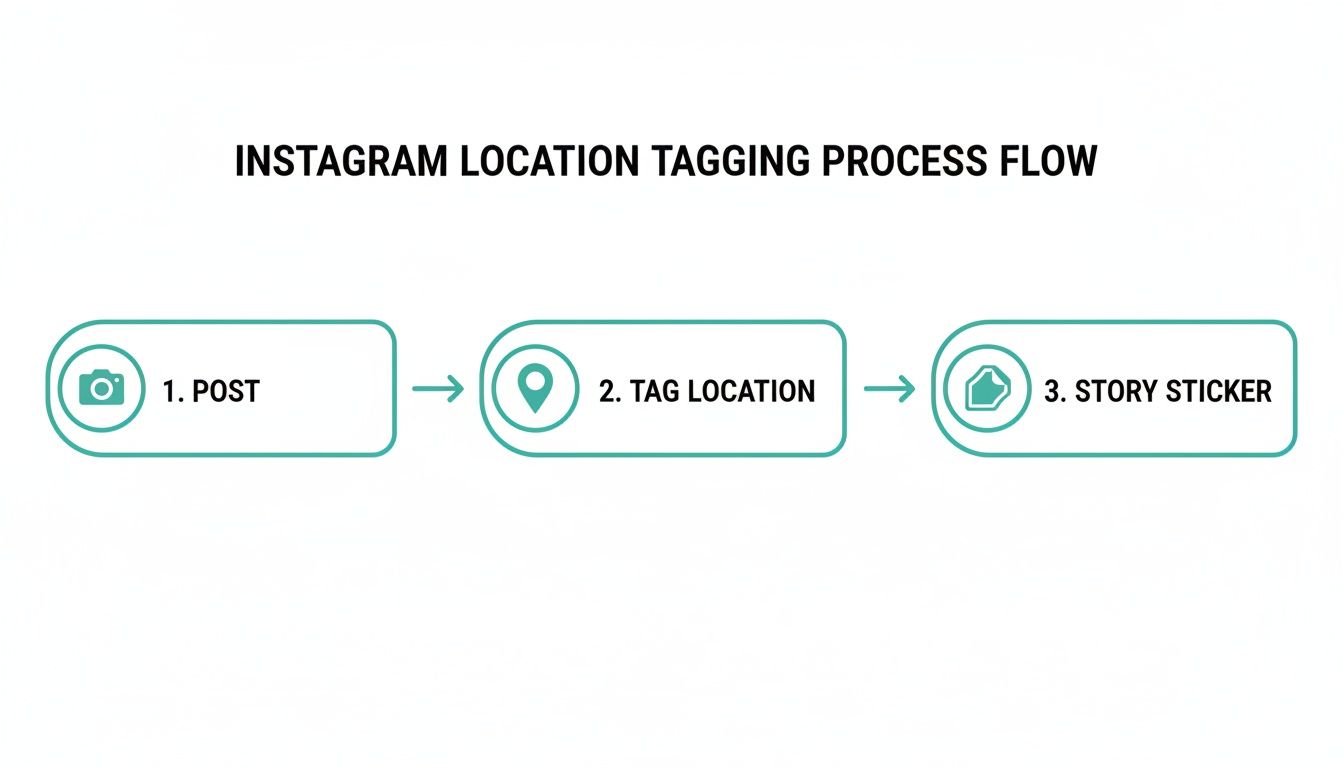
This process visualizes the three primary ways you can tag your location: within a feed post, as an interactive sticker in your Story, or in your main profile.
When your custom location is finally live, you and—more importantly—your customers can start tagging you. For a deeper dive into this, check out our full guide on how to create a Facebook Place. It's a small step that gives you control over your digital footprint and makes sure customers can always find and promote you.
Alright, let's get into the nitty-gritty. Even when you follow all the steps to the letter, technology can—and will—throw you a curveball.
You’ve done everything right: you created your custom location on Facebook, you've been patiently waiting, but it’s still nowhere to be found when you try to tag it on Instagram. It’s a super common frustration, but the fix is usually much simpler than you'd think.
When your location tag is playing hide-and-seek, the problem almost always boils down to permissions and the data sync between your phone, Facebook, and Instagram. Before you get too deep into the weeds, running through a quick diagnostic checklist usually solves the problem in minutes.
My Custom Location Isn’t Showing Up
This is, without a doubt, the number one issue people run into. You did the work on Facebook, but it feels like Instagram never got the memo. It can feel like you've hit a wall, but there are a few things to check.
First, start with the most basic question: have you given it enough time? As we covered earlier, the sync between Facebook and Instagram isn't instant. It can take a few hours or, in some cases, a couple of days to fully propagate. If it's been less than 48 hours, your best move is to just wait it out.
If time has passed and you're still coming up empty, it's time to investigate these usual suspects:
- Phone Location Services: Double-check that your GPS is enabled for both the Facebook and Instagram apps. Dive into your phone’s settings, find the app permissions for each, and make sure location access is set to "While Using the App" or "Always."
- Outdated Apps: A pending update can cause all sorts of weird bugs. Pop over to your app store and see if there are any updates waiting for either Instagram or Facebook. Installing the latest version often clears up syncing problems.
- Clear the Cache: Apps store temporary data to load faster, but this cache can get corrupted over time. In your phone's app settings, find Instagram and tap the "Clear Cache" option. This forces the app to pull fresh data, which hopefully includes your new location.
Pro Tip: Remember that you created the location using Facebook's "Check In" feature. Head back to Facebook and try to use the location tag in a new post there. If it works on Facebook, the issue is almost certainly just a sync delay with Instagram. If it's missing on Facebook too, the location might not have been approved in the first place.
The Location Pin is Inaccurate or in the Wrong Place
Another classic headache is seeing your business on the map, but the pin is dropped a few blocks away from your actual entrance. This is more than a minor annoyance—it can send customers on a wild goose chase.
This problem almost always originates from the initial setup on Facebook.
The most direct way to fix this is to go back to the source. On your Facebook Business Page, you can suggest an edit to your location. Navigate to your page, find the "About" section, and look for your address. You should see an option to "Suggest Edits," which will let you manually drag the map pin to the exact rooftop of your building.
Dealing with Duplicate or Unofficial Locations
Sometimes, you'll discover that enthusiastic customers have already created a location for your business—and maybe even misspelled the name. Ouch. Having multiple, unofficial listings can seriously dilute your brand's presence and confuse your followers.
In this case, your goal is consolidation. You want everyone using the single, official location that you control. While you can't just delete the duplicates created by others, you can take steps to either merge them or report them as incorrect through Facebook's location editing tools.
The most important thing you can do is consistently use and promote your official tag in your own content. Over time, this trains your audience and the algorithm on which one is the real deal.
Got Questions About Instagram Locations? We've Got Answers
Even after you’ve got the basics down, a few tricky questions always seem to pop up. Let's clear up some of the most common things we hear so you can get your business showing up on Instagram exactly where it needs to be.
Can I Add a Location Without a Facebook Page?
Nope. For adding that clickable address to your Instagram bio, a linked Facebook Business Page is non-negotiable. Instagram is part of the Meta family, and it pulls all its business and location data straight from Facebook’s massive directory.
Sure, you can tag existing nearby spots in your posts without that link, but you won't be able to add the official address to your profile or create a custom location tag just for your business. Think of the Facebook connection as the key that unlocks all the best local business tools on Instagram.
How Long Does It Take for a New Custom Location to Show Up?
This one can be a little unpredictable. The sync time between creating a new location on Facebook and seeing it pop up on Instagram varies. Sometimes it’s almost instant, but more often than not, you're looking at a wait time of a few hours to a couple of days.
My rule of thumb? If your shiny new location hasn't appeared after 48 hours, don't just sit around and wait. Try creating it again, but this time, make sure you're physically at the business address with your phone's location services turned on. It gives Facebook a much stronger signal to verify and approve it faster.
If I Change My Address, Will It Update My Old Posts?
Changing the business address in your Instagram profile's contact settings will not automatically update the location tags on your old posts. Each geotag on a feed post is locked in the moment you hit "publish."
So, if your business moves, you’ll need to update your profile address and start using the new location tag on all your content moving forward. If you really want to keep things consistent, you can go back and manually edit the location on older posts, but you'll have to do it one by one.
Is It Possible to Hide My Street Address but Still Show My City?
Absolutely. This is a game-changer for service-area businesses or anyone who just wants a little more privacy.
When you navigate to "Edit Profile" > "Contact Options" > "Business Address," Instagram will ask for your full street address. This is for verification, so you do have to enter it. But once you do, you'll see a toggle for "Display full address." Just switch that off, and your profile will only show your city and state. It’s the perfect way to tell customers your general service area without putting your exact address on blast.
Ready to see exactly where your business ranks on local maps and turn those rankings into real foot traffic? Nearfront gives you AI-powered heatmaps and local engagement tools to show you what's working, what's not, and how to outrank the competition next door. Learn more at https://nearfront.com.